Ford Explorer: Maintenance / Changing a Bulb
WARNING: Switch the lamps and the ignition off. Failure to do so could result in serious personal injury.
WARNING: Bulbs can become hot. Let the bulb cool down before removing it. Failure to do so could result in personal injury.
Use the correct specification bulb. See Bulb Specification Chart. Install in the reverse order unless otherwise stated.
IPTV Free TrialRear Direction Indicator and Reversing Lamp

- Switch all of the lamps and the ignition off.
- Use a suitable tool, for example a screwdriver, to carefully remove the access cover.
- Remove the side cover.
- Remove the screw that secures the lamp assembly.
- Gently pull the lamp assembly away from the vehicle.
- Turn the bulb holder counterclockwise and remove it.
- Remove the bulb by pulling it straight out.

A - Rear direction indicator.
B - Reverse lamp.
LED Lamps
LED lamps are not serviceable items. See an authorized dealer if they fail.
The following lamps are LED:
- Headlamp low beam.
- Headlamp high beam.
- Front direction indicator.
- Side direction indicator.
- Daytime running lamps.
- Front fog lamps (if equipped).
- Brake and rear lamp.
- Rear side marker lamp.
- Rear fog lamps (if equipped).
- Front side marker lamps.
- Front signature lamps.
- Central high mounted brake lamp.
License Plate Lamp

- Use a suitable tool, for example a screwdriver, to carefully remove the lamp.
- Turn the bulb holder counterclockwise and remove it.
- Remove the bulb by pulling it straight out.
 Adjusting the Headlamps
Vertical Aim Adjustment
If your vehicle has been involved in a crash, have the aim of the headlamp beam
checked by an authorized dealer.
A - 8 ft (2...
 Changing the Engine Air Filter - 2.3L EcoBoost™
WARNING: To reduce the risk of vehicle damage and personal burn injuries,
do not start your engine with the air cleaner removed and do not remove it while
the engine is running...
Other information:
Ford Explorer 2020-2025 Service Manual: General Procedures - Washer Hose Coupling
Disconnect WARNING: Before beginning any service procedure in this section, refer to Safety Warnings in section 100-00 General Information. Failure to follow this instruction may result in serious personal injury. Refer to: Health and Safety Precautions (100-00 General Information, Description and Operation)...
Ford Explorer 2020-2025 Service Manual: General Procedures - Refrigerant System Tests - 2.3L EcoBoost (201kW/273PS)
Inspection NOTE: Procedure 1 — Ambient Temperature below 21 °C (70 °F). NOTE: Proper A/C system diagnosis on a vehicle’s compressor is dependent on correct refrigerant system charge and tested in ambient temperatures above 21°C (70°F)...
Categories
- Manuals Home
- 6th Generation Explorer Owners Manual
- 6th Generation Explorer Service Manual
- Removal and Installation - Front Halfshaft Speed Sensor
- Using Tether Straps
- Traction Control
- New on site
- Most important about car
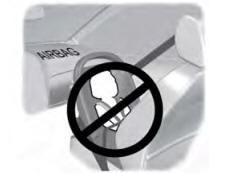
Children and Airbags
WARNING: Airbags can kill or injure a child in a child restraint. Never place a rear-facing child restraint in front of an active airbag. If you must use a forward-facing child restraint in the front seat, move the seat upon which the child restraint is installed all the way back.

