Ford Explorer: Accessory Drive - 2.3L EcoBoost (201kW/273PS) / Removal and Installation - Accessory Drive Belt
Removal
NOTICE: Under no circumstances should the accessory drive belt, tensioner or pulleys be lubricated as potential damage to the belt material and tensioner damping mechanism will occur. Do not apply any fluids or belt dressing to the accessory drive belt or pulleys.
IPTV Free TrialNOTE: Removal steps in this procedure may contain installation details.
-
Refer to: Health and Safety Precautions (100-00 General Information, Description and Operation).
-
Refer to: Jacking and Lifting - Overview (100-02 Jacking and Lifting, Description and Operation).
-
Remove the air conditioning A/C compressor belt.
Refer to: Air Conditioning (A/C) Compressor Belt (303-05A Accessory Drive - 2.3L EcoBoost (201kW/273PS), Removal and Installation).
-
NOTICE: Do not pull the engine appearance cover forward or sideways to remove. Failure to press straight upward on the underside of the cover at the attachment points may result in damage to the cover or engine components.
Remove the stud nuts, and remove the appearance cover from the engine.
Torque: 89 lb.in (10 Nm)
.jpg) |
-
Remove the clamp and position aside the CAC tube.
Torque: 48 lb.in (5.4 Nm)
.jpg) |
-
Remove the bolts (Enhanced Hexalobular or TORX PLUS ®
Acument Intellectual Properties, LLC as the owner) and the shield.
Torque: 18 lb.ft (25 Nm)
.jpg) |
-
NOTE: After installation, make sure the accessory drive belt is correctly seated on all the pulleys.
-
Rotate the accessory drive belt tensioner counter
clockwise and remove the accessory drive belt, then release the
accessory drive belt tensioner.
-
Rotate the accessory drive belt tensioner counter
clockwise and remove the accessory drive belt, then release the
accessory drive belt tensioner.
.jpg) |
Installation
-
To install, reverse the removal procedure.
-
NOTE: Safety shield must be re-installed, to protect hands in the case of an un-expected start.
-
After installation, make sure the accessory drive belt is correctly seated on pulleys.
-
After installation, make sure the accessory drive belt is correctly seated on pulleys.
.jpg) |
-
Install the appearance cover, and tighten the stud nuts.
Torque: 89 lb.in (10 Nm)
.jpg) |
 Diagnosis and Testing - Accessory Drive
Inspection and Verification
Verify the customer concern.
Visually inspect for obvious signs of mechanical damage.
Visual Inspection Chart
Mechanical
..
 Removal and Installation - Accessory Drive Belt Idler Pulley
Removal
NOTICE:
Under no circumstances should the accessory drive belt,
tensioner or pulleys be lubricated as potential damage to the belt
material and tensioner damping mechanism will occur...
Other information:
Ford Explorer 2020-2025 Service Manual: Removal and Installation - Steering Gear
Special Tool(s) / General Equipment Tie Rod End Remover Removal NOTICE: Suspension fasteners are critical parts that affect performance of vital components and systems. Failure of these fasteners may result in major service expense...
Ford Explorer 2020-2025 Service Manual: Removal and Installation - Rear Side Marker Flashing Light Emitting Diode (LED) Lamps
Special Tool(s) / General Equipment Interior Trim Remover Removal NOTE: Removal steps in this procedure may contain installation details. NOTE: LH lamp assembly shown, RH lamp assembly is similar. Remove the loadspace trim panel...
Categories
- Manuals Home
- 6th Generation Explorer Owners Manual
- 6th Generation Explorer Service Manual
- Interior Trim and Ornamentation
- Traction Control
- Diagnosis and Testing - Parking Brake - Vehicles With: Electric Brake Booster
- New on site
- Most important about car
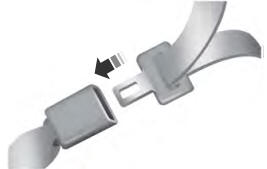
Fastening the Seatbelts
The front outboard and rear safety restraints in the vehicle are combination lap and shoulder belts.

