Ford Explorer: Rear Drive Halfshafts / Diagnosis and Testing - Rear Drive Halfshafts
Preliminary Inspection
-
Visually inspect the CV joints, housing, boots, and clamps for obvious signs of mechanical damage.
-
If an obvious cause for an observed or reported concern is
found, correct the cause (if possible) before proceeding to the next
step
-
If the cause is not visually evident, verify the symptom and REFER to Symptom Chart: NVH.
Symptom Chart(s)
Diagnostics in this manual assume a certain skill level and knowledge of Ford-specific diagnostic practices.
REFER to: Diagnostic Methods (100-00 General Information, Description and Operation).
Symptom Chart: NVH
Symptom Chart
| Condition | Possible Sources | Actions |
|---|---|---|
| Driveline clunk - loud clunk when shifting from REVERSE to DRIVE |
|
|
|
|
|
| Driveline clunk — occurs as the vehicle starts to move forward following a stop |
|
|
| Grunting — normally associated with a shudder experienced during acceleration from a complete stop |
|
|
| Driveline vibration - occurs at cruising speeds |
|
|
Differential Seals
NOTICE: When installing shafts, do not allow splines to contact seals during installation or damage to the seals may occur.
Halfshaft seals are susceptible to the same types of damage as drive pinion seals if incorrectly installed. The seal bore must be clean and the lip handled carefully to avoid cutting or tearing it. The seal journal surface must be free of nicks, gouges and rough surface texture.
For information on differential seals,
REFER to: Rear Halfshaft Seal (205-02 Rear Drive Axle/Differential, Removal and Installation).
 Removal and Installation - Rear Halfshaft
Removal
NOTICE:
Never pick up or hold the halfshaft by only the inner or outer CV joint. Damage to the CV joint will occur.
NOTICE:
Never use a hammer to remove or install the halfshafts...
Other information:
Ford Explorer 2020-2025 Service Manual: Removal and Installation - Output Shaft Seal
Special Tool(s) / General Equipment 100-001 (T50T-100-A) Slide Hammer 205-1018Installation Tube 307-309Remover, Torque Converter SealTKIT-1994-FMH/FLMHTKIT-1994-LMH/MHTKIT-1994-FH 307-782Installer, Output Shaft Seal Punch Removal With the vehicle in NEUTRAL, position it on a hoist...
Ford Explorer 2020-2025 Service Manual: Specifications
Lubricants, Fluids, Sealers and Adhesives NOTICE: Do not over-lubricate the driveshaft components. Using excessive grease may damage the driveshaft components. NOTE: Wipe off any excess grease. Item Description Specification Rear driveshaft: Front tube plunging splines Material: Motorcraft® Premium Long-Life Grea..
Categories
- Manuals Home
- 6th Generation Explorer Owners Manual
- 6th Generation Explorer Service Manual
- Interior Trim and Ornamentation
- Removal and Installation - Front Halfshaft Speed Sensor
- General Procedures - Rear Camber Adjustment
- New on site
- Most important about car
Child Safety Locks
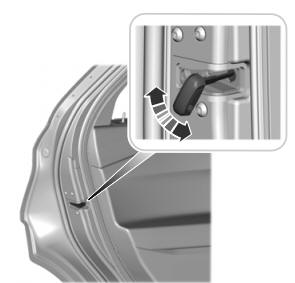
When these locks are set, you cannot open the rear doors from the inside.

A child safety lock is on the rear edge of each rear door. You must set the child safety lock separately on each door.
Left-Hand Side

