Ford Explorer: Front Drive Axle/Differential / Removal and Installation - Differential Breather Tube
Ford Explorer 2020-2025 Service Manual / Chassis / Driveline / Front Drive Axle/Differential / Removal and Installation - Differential Breather Tube
Removal
NOTE: Removal steps in this procedure may contain installation details.
-
Remove the front RH wheel only.
Refer to: Wheel and Tire (204-04A Wheels and Tires, Removal and Installation).
-
-
Remove the pin-type retainer.
-
Remove the bolts and the radiator air deflector.
-
Remove the bolts.
-
Remove the retainers and the engine undershield.
-
Remove the pin-type retainer.
.jpg) |
-
Remove the pin-type retainers and the RH steering gear splash shield.
.jpg) |
-
Disconnect the breather hose from the front axle assembly vent tube and detach the breather hose tie straps.
.jpg) |
-
Detach the tie strap and remove the front axle assembly breather hose.
.jpg) |
-
IPTV Free Trial
NOTICE: Make sure the axle assembly vent tube and vent plug is not damaged or blocked.
Clean and inspect the front axle assembly vent tube.
.jpg) |
-
NOTE: This step is not necessary when installing a new component.
Inspect front axle assembly the vent tube for blocked or cracked. Install new vent tube and vent plug if .
.jpg) |
Installation
-
To install, reverse the removal the procedure.
 Removal and Installation - Axle Shaft Seal
Special Tool(s) /
General Equipment
205-907Handle, 32 DriverTKIT-2008DH-FLM
307-256
(T92P-77000-FH)
Installer, Differential Fluid SealTKIT-1992-FLMH/LMH
Removal
NOTE:
Th..
 Removal and Installation - Drive Pinion Seal
Special Tool(s) /
General Equipment
205-1065Installer, Pinion Seal
205-199
(T83T-3132-A1)
Installer, Spindle/Axle ShaftT83-4000-ATKIT-1983-FTKIT-1983-FLMTKIT-1983-FX
Flat Headed S..
Other information:
Ford Explorer 2020-2025 Owners Manual: Head Restraints
WARNING: Fully adjust the head restraint before you sit in or operate your vehicle. This will help minimize the risk of neck injury in the event of a crash. Do not adjust the head restraint when your vehicle is moving. WARNING: The head restraint is a safety device...
Ford Explorer 2020-2025 Service Manual: Specifications
Battery Specifications 2.3L EcoBoost Vehicles Item Specification Voltage 12 Volts Battery amps rating 70 Ah Cold Cranking Amps (CCA) measured at -18 C (-0...
Categories
- Manuals Home
- 6th Generation Explorer Owners Manual
- 6th Generation Explorer Service Manual
- Fuel Filler Funnel Location & Running Out of Fuel
- General Procedures - Transmission Fluid Drain and Refill
- Engine
- New on site
- Most important about car
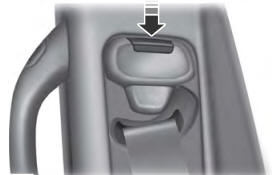
Seatbelt Height Adjustment
WARNING: Position the seatbelt height adjuster so that the seatbelt rests across the middle of your shoulder. Failure to adjust the seatbelt correctly could reduce its effectiveness and increase the risk of injury in a crash.
Copyright © 2025 www.foexplorer.com