Ford Explorer: Rear Drive Axle/Differential / Removal and Installation - Drive Pinion Seal
Ford Explorer 2020-2025 Service Manual / Chassis / Driveline / Rear Drive Axle/Differential / Removal and Installation - Drive Pinion Seal
Special Tool(s) / General Equipment
.jpg) |
205-1061 Installer, Pinion Seal 8.8 |
.jpg) |
205-1062 Installer, Pinion Seal 8.15 |
.jpg) |
205-199
(T83T-3132-A1)
Installer, Spindle/Axle Shaft T83-4000-A TKIT-1983-F TKIT-1983-FLM TKIT-1983-FX |
| Flat Headed Screw Driver | |
Materials
| Name | Specification |
|---|---|
| Motorcraft® Premium Long-Life Grease XG-1-E1 |
ESA-M1C75-B |
Removal
-
With the vehicle in NEUTRAL, position it on a hoist.
Refer to: Jacking and Lifting - Overview (100-02 Jacking and Lifting, Description and Operation).
-
Remove the rear driveshaft.
Refer to: Rear Driveshaft (205-01 Driveshaft, Removal and Installation).
-
Remove and discard the drive pinion seal.
Use the General Equipment: Flat Headed Screw Driver
.jpg) |
Installation
All vehicles
-
Lubricate the new drive pinion seal lip with grease.
Material: Motorcraft® Premium Long-Life Grease / XG-1-E1 (ESA-M1C75-B)
.jpg) |
Vehicle equipped with 8.1-Inch Ring Gear
-
Using the special tool, install the new drive pinion seal.
Use Special Service Tool: 205-1062 Installer, Pinion Seal 8.15. , 205-199 (T83T-3132-A1) Installer, Spindle/Axle Shaft.
.jpg) |
Vehicle equipped with 8.8-Inch Ring Gear
-
Using the special tool, install the new drive pinion seal.
Use Special Service Tool: 205-1061 Installer, Pinion Seal 8.8. , 205-199 (T83T-3132-A1) Installer, Spindle/Axle Shaft.
.jpg) |
All vehicles
-
Install the rear driveshaft.
Refer to: Rear Driveshaft (205-01 Driveshaft, Removal and Installation).
-
Check the RDU fluid level.
Refer to: Differential Fluid Level Check (205-02 Rear Drive Axle/Differential, General Procedures).
 Removal and Installation - Differential Housing Cover
Materials
Name
Specification
Motorcraft® Ultra Silicone SealantTA-29
WSS-M4G323-A8
Removal
With the vehicle in NEUTRAL, position it on a hoist...
 Removal and Installation - Rear Halfshaft Seal
Special Tool(s) /
General Equipment
205-153
(T80T-4000-W)
Handle
307-758Installer, Axle Seal -FWD
Feeler Gauge
Flat Headed Screw Driver
Removal
NOTE:
The stub shaf..
Other information:
Ford Explorer 2020-2025 Service Manual: Removal and Installation - Cabin Air Filter
Removal Push the stop tabs inwards and fully lower the glove compartment. Remove the glove compartment check strap. Remove the screws and lower the cabin air filter door. Remove the cabin air filter...
Ford Explorer 2020-2025 Service Manual: General Procedures - Plastic Repairs
Materials Name Specification Plastic Bonding AdhesiveTA-9 - Inspection NOTE: Plastics Identification WARNING: Before beginning any service procedure in this manual, refer to health and safety warnings in section 100-00 General Information...
Categories
- Manuals Home
- 6th Generation Explorer Owners Manual
- 6th Generation Explorer Service Manual
- General Procedures - Transmission Fluid Drain and Refill
- Interior Trim and Ornamentation
- Automatic Transmission - 10-Speed Automatic Transmission – 10R60
- New on site
- Most important about car
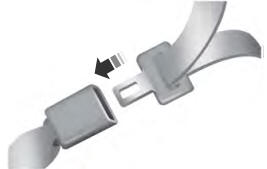
Fastening the Seatbelts
The front outboard and rear safety restraints in the vehicle are combination lap and shoulder belts.

Copyright © 2025 www.foexplorer.com
