Ford Explorer: Anti-Lock Brake System (ABS) and Stability Control / Removal and Installation - Electric Brake Booster (EBB)
Removal
NOTE: Removal steps in this procedure may contain installation details.
NOTE: The EBB and the ABS module are serviced as an assembly and should not be separated.
-
NOTE: The PMI process must begin with the current ABS module installed. If the current ABS module does not respond to the diagnostic scan tool, the tool may prompt for As-Built Data as part of the repair.
Using a diagnostic scan tool, begin the PMI process for the ABS module following the onscreen instructions.
-
Remove the cowl panel grille.
Refer to: Cowl Panel Grille (501-02 Front End Body Panels, Removal and Installation).
-
Disconnect the battery.
Refer to: Battery Disconnect and Connect (414-01 Battery, Mounting and Cables, General Procedures).
-
Release the tabs and remove the BCMC cover.
.jpg) |
-
-
Remove the nut and position aside the cable aside.
Torque: 106 lb.in (12 Nm)
-
Fully loosen the BCMC connector bolts.
Torque: 48 lb.in (5.4 Nm)
-
Remove the nut and position aside the cable aside.
.jpg) |
-
Release the tabs and remove the BCMC.
.jpg) |
-
Remove the bolts, detach the wiring retainers and then remove the BCMC support bracket.
Torque: 106 lb.in (12 Nm)
.jpg) |
-
IPTV Free Trial
NOTICE: If the brake fluid is spilled on any component, the affected area must be immediately washed down with cold water.
NOTE: Be prepared to collect escaping fluid.
Disconnect the remote brake fluid reservoir tube and drain the fluid into a suitable container.
.jpg) |
-
Disconnect the electrical connectors.
.jpg) |
-
Remove the brake tube routing clip.
.jpg) |
-
NOTICE: If the brake fluid is spilled on any component, the affected area must be immediately washed down with cold water.
NOTE: Make sure that all openings are sealed.
Disconnect the brake tube fittings.
Torque: 159 lb.in (18 Nm)
.jpg) |
-
Release the push pin and remove the drivers side insulation panel.
-
Remove the bolts.
Torque: 28 lb.in (3.2 Nm)
-
Remove the nut.
Torque: 22 lb.in (2.5 Nm)
-
Remove the bolts.
.jpg) |
-
Remove the access cover.
.jpg) |
-
Remove the bolts, release the clips and remove the lower steering column trim panel.
-
Release the tabs and position aside the electrical connector and harness.
Torque: 17 lb.in (1.9 Nm)
-
Release the tabs and position aside the electrical connector and harness.
-
NOTICE: Do not service the brake pedal or brake booster without first removing the stoplamp switch. This switch must be removed with the brake pedal in the at-rest position. The switch plunger must be compressed for the switch to rotate in the bracket. Attempting to remove the switch when the plunger is extended (during pedal apply) will result in damage to the switch.
Remove the stoplamp switch.
Refer to: Stoplamp Switch (417-01 Exterior Lighting, Removal and Installation).
.jpg) |
-
Push inward on the tabs and remove the clevis pin.
.jpg) |
-
NOTE: The LH lower nut can be removed from underneath the instrument panel and the remaining 3 nuts through the steering column cover opening.
Remove the EBB nuts in the order shown.
Torque: 177 lb.in (20 Nm)
.jpg) |
-
Remove the clip and the EBB.
.jpg) |
Installation
-
To install, reverse the removal procedure.
-
Using a diagnostic scan tool, complete the PMI process for the ABS module following the on-screen instructions.
-
Carry out the ABS
Calibration and the Brake System Pressure Bleeding service functions
using the scan tool and following the diagnostic scan tool on-screen
instructions.
-
Run the PCM
PATS
programming application and then carry out the Module Initialization
(Parameter Reset) using the scan tool and following the diagnostic scan
tool on-screen instructions.
 Description and Operation - Anti-Lock Brake System (ABS) and Stability Control - System Operation and Component Description
System Operation
System Diagram
Item
Description
1
ABS module
2
Hydraulic pressure sensor
3
EBB assembly
4
Wheel speed sensors
5
GWM
6..
 Removal and Installation - Front Wheel Speed Sensor
Materials
Name
Specification
Motorcraft® Metal Brake Parts CleanerPM-4-A, PM-4-B
-
Removal
NOTE:
Removal steps in this procedure may contain installation details...
Other information:
Ford Explorer 2020-2025 Service Manual: General Procedures - Liftgate Latch Manual Release
Special Tool(s) / General Equipment Flat-Bladed Screwdriver Interior Trim Remover Activation Remove the liftgate latch access cover from the center of the liftgate trim panel. Use the General Equipment: Interior Trim Remover Insert a flat-bladed screwdriver through the access cover opening and depress the cinch release button...
Ford Explorer 2020-2025 Service Manual: General Procedures - Transfer Case Draining and Filling
Draining With the vehicle in NEUTRAL, position it on a hoist. Refer to: Jacking and Lifting - Overview (100-02 Jacking and Lifting, Description and Operation). If equipped. Torque: 21 lb.ft (28 Nm) Remove the drain plug and drain the fluid...
Categories
- Manuals Home
- 6th Generation Explorer Owners Manual
- 6th Generation Explorer Service Manual
- Removal and Installation - All-Wheel Drive (AWD) Module
- Electric Parking Brake
- Interior Trim and Ornamentation
- New on site
- Most important about car
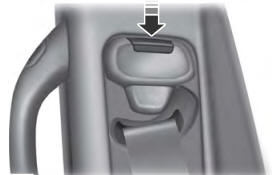
Seatbelt Height Adjustment
WARNING: Position the seatbelt height adjuster so that the seatbelt rests across the middle of your shoulder. Failure to adjust the seatbelt correctly could reduce its effectiveness and increase the risk of injury in a crash.

