Ford Explorer: Front End Body Panels / Removal and Installation - Fender Splash Shield
Ford Explorer 2020-2025 Service Manual / Body and Paint / Body and Paint / Front End Body Panels / Removal and Installation - Fender Splash Shield
Removal
NOTE: Removal steps in this procedure may contain installation details.
NOTE: LH side shown, RH side similar.
-
Remove the wheel and tire.
Refer to: Wheel and Tire (204-04A Wheels and Tires, Removal and Installation).
-
Remove the front fender moulding.
Refer to: Front Fender Moulding (501-08 Exterior Trim and Ornamentation, Removal and Installation).
-
-
Remove the pin-type retainers.
-
Remove the screws.
Torque: 22 lb.in (2.5 Nm)
-
Remove the pin-type retainers.
.jpg) |
-
Remove the following items:
-
Remove the nut.
Torque: 22 lb.in (2.5 Nm) -
Remove the nuts.
Torque: 53 lb.in (6 Nm)
-
Remove the nut.
.jpg) |
-
Remove the pin-type retainers and the fender splash shield.
.jpg) |
Installation
-
To install, reverse the removal procedure.
 Removal and Installation - Fender
Special Tool(s) /
General Equipment
Knife
Materials
Name
Specification
Flexible Foam Repair3M™ 08463, LORD Fusor® 121
-
Removal
NOTE:
Removal steps in this pro..
 Removal and Installation - Hood
Removal
NOTE:
Removal steps in this procedure may contain installation details.
Detach the windshield washer hose coupling.
Detach the windshield washer..
Other information:
Ford Explorer 2020-2025 Service Manual: Removal and Installation - Evaporator Temperature Sensor
Removal NOTE: The evaporator temperature sensor is available only as part of the evaporator. Remove the evaporator. Refer to: Evaporator (412-00 Climate Control System - General Information, Removal and Installation). Installation Transfer the components from the old housing to the new housing as needed...
Ford Explorer 2020-2025 Service Manual: Description and Operation - Third Row Seats - System Operation and Component Description
System Operation System Diagram Item Description 1 SCMJ 2 HS-CAN1 3 PCM 4 Liftgate Ajar Switch 5 Power Fold Seat Control Switch 6 Power Folding Seat Motors 7 Hall-Effect Sensors 8 Motors 9 MS-CAN 10 GWM 11 BCM Network Message Chart SCMJ Network Input Messag..
Categories
- Manuals Home
- 6th Generation Explorer Owners Manual
- 6th Generation Explorer Service Manual
- Diagnosis and Testing - Parking Brake - Vehicles With: Electric Brake Booster
- Description and Operation - Identification Codes
- General Procedures - Rear Camber Adjustment
- New on site
- Most important about car
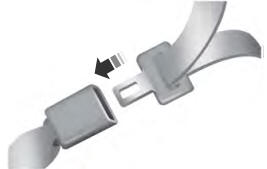
Fastening the Seatbelts
The front outboard and rear safety restraints in the vehicle are combination lap and shoulder belts.

Copyright © 2025 www.foexplorer.com
