Ford Explorer: Front End Body Panels / Removal and Installation - Hood
Ford Explorer 2020-2025 Service Manual / Body and Paint / Body and Paint / Front End Body Panels / Removal and Installation - Hood
Removal
NOTE: Removal steps in this procedure may contain installation details.
-
Detach the windshield washer hose coupling.
.jpg) |
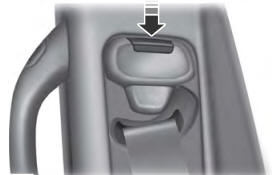
-
Detach the windshield washer hose pin-type retainers from the hood hinge.
.jpg) |
-
On both sides.
Index-mark the hood hinge location to aid in hood installation.
.jpg) |
-
Remove the nuts and the hood.
Torque: 159 lb.in (18 Nm)
.jpg) |
-
IPTV Free Trial
NOTE: This step is only necessary when installing a new component.
Remove the pin-type retainers and the hood insulation.
.jpg) |
-
NOTE: This step is only necessary when installing a new component.
Detach the retainers, couplings and remove the windshield washer hose.
.jpg) |
-
NOTE: This step is only necessary when installing a new component.
Remove the nuts and the striker latch.
Torque: 80 lb.in (9 Nm)
.jpg) |
-
NOTE: This step is only necessary when installing a new component.
Remove the pin-type retainers and the weatherstrip.
.jpg) |
Installation
-
To install, reverse the removal procedure.
-
Check the hood alignment. Align the hood as necessary.
Refer to: Hood Alignment (501-03 Body Closures, General Procedures).
 Removal and Installation - Fender Splash Shield
Removal
NOTE:
Removal steps in this procedure may contain installation details.
NOTE:
LH side shown, RH side similar.
Remove the wheel and tire...
 Removal and Installation - Radiator Grille Opening Panel
Removal
NOTE:
Removal steps in this procedure may contain installation details.
Remove both the headlamps.
Refer to: Headlamp Assembly (417-01 Exterior Lighting, Removal and Installatio..
Other information:
Ford Explorer 2020-2025 Owners Manual: Rear Passenger Climate Controls
Note: Depending on your vehicle option package, the controls may look different from what you see here. Directing Air to the Overhead Air Vents Press and release the button to direct airflow to the overhead air vents. Directing Air to the Rear Footwell Air Vents Press and release the button to direct airflow to rear footwell air vents...
Ford Explorer 2020-2025 Owners Manual: Changing a Road Wheel
WARNING: If the tire pressure monitor sensor becomes damaged it may not function. Note: You should only use tire sealants in roadside emergencies as they may cause damage to the tire pressure monitoring system sensor. Note: The tire pressure monitoring system indicator light illuminates when the spare tire is in use...
Categories
- Manuals Home
- 6th Generation Explorer Owners Manual
- 6th Generation Explorer Service Manual
- Using Tether Straps
- General Procedures - Transmission Fluid Drain and Refill
- Removal and Installation - Front Halfshaft Speed Sensor
- New on site
- Most important about car
Seatbelt Height Adjustment
WARNING: Position the seatbelt height adjuster so that the seatbelt rests across the middle of your shoulder. Failure to adjust the seatbelt correctly could reduce its effectiveness and increase the risk of injury in a crash.
Copyright © 2025 www.foexplorer.com