Ford Explorer: Body Closures / Removal and Installation - Liftgate
Ford Explorer 2020-2025 Service Manual / Body and Paint / Body and Paint / Body Closures / Removal and Installation - Liftgate
Removal
NOTE: Removal steps in this procedure may contain installation details.
-
Remove the liftgate trim panel.
Refer to: Liftgate Trim Panel (501-05 Interior Trim and Ornamentation, Removal and Installation).
-
Remove the D-Pillar trim panel.
Refer to: D-Pillar Trim Panel (501-05 Interior Trim and Ornamentation, Removal and Installation).
Refer to: D-Pillar Trim Panel - Police (501-05 Interior Trim and Ornamentation, Removal and Installation).
-
Remove the following items:
-
Disconnect the electrical connectors.
-
Remove the bolt.
-
Detach the wiring harness retainers and route through the liftgate.
-
Disconnect the electrical connectors.
.jpg) |
-
Detach the rear wiper washer hose connector.
.jpg) |
-
Remove the grommet and route the harness out of the liftgate..
.jpg) |
-
Mark the location of the liftgate hinge bolts.
.jpg) |
-
https://magicaliptv.com/iptv-free-trials/
NOTE: This step requires the aid of another technician.
On both sides.
Remove the clips holding the liftgate struts or the power liftgate motor and position aside.
.jpg) |
-
NOTE: This step requires the aid of another technician.
Remove the liftgate bolts and remove the liftgate from the vehicle.
Torque: 22 lb.ft (30 Nm)
.jpg) |
Installation
-
To install, reverse the removal procedure.
-
Align the liftgate as necessary.
Refer to: Liftgate Alignment (501-03 Body Closures, General Procedures).
Vehicles with power liftgate
-
Carry-out the power liftgate initialization.
Refer to: Power Liftgate Initialization (501-03 Body Closures, General Procedures).
 Removal and Installation - Hands-Free Liftgate Actuation Upper Sensor
Removal
NOTE:
Removal steps in this procedure may contain installation details.
Remove the rear bumper cover.
Refer to: Rear Bumper Cover (501-19 Bumpers, Removal and Installation)...
 Removal and Installation - Liftgate Anti-Pinch Switch
Removal
NOTE:
Removal steps in this procedure may contain installation details.
NOTE:
LH side shown, RH side similar.
Remove the liftgate trim panel...
Other information:
Ford Explorer 2020-2025 Service Manual: Removal and Installation - Differential Housing Cover
Materials Name Specification Motorcraft® Ultra Silicone SealantTA-29 WSS-M4G323-A8 Removal With the vehicle in NEUTRAL, position it on a hoist. Refer to: Jacking and Lifting - Overview (100-02 Jacking and Lifting, Description and Operation)...
Ford Explorer 2020-2025 Service Manual: Removal and Installation - Front Lower Arm
Special Tool(s) / General Equipment 204-592Separator, Lower Arm Ball JointTKIT-2006C-FFMFLMTKIT-2006C-LMTKIT-2006C-ROW Vehicle/Axle Stands Removal NOTICE: Suspension fasteners are critical parts that affect the performance of vital components and systems...
Categories
- Manuals Home
- 6th Generation Explorer Owners Manual
- 6th Generation Explorer Service Manual
- Engine
- Automatic Transmission - 10-Speed Automatic Transmission – 10R60
- General Procedures - Rear Camber Adjustment
- New on site
- Most important about car
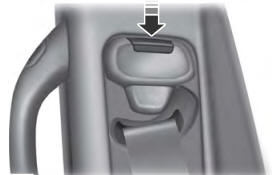
Seatbelt Height Adjustment
WARNING: Position the seatbelt height adjuster so that the seatbelt rests across the middle of your shoulder. Failure to adjust the seatbelt correctly could reduce its effectiveness and increase the risk of injury in a crash.

Copyright © 2025 www.foexplorer.com
