Ford Explorer: Power Steering / Removal and Installation - Tie Rod
Special Tool(s) / General Equipment
| Boot Clamp Pliers |
Materials
| Name | Specification |
|---|---|
| Motorcraft® Premium Long-Life Grease XG-1-E1 |
ESA-M1C75-B |
Removal
NOTICE: When servicing inner tie rods, install a new bellows boot and clamps. The boots and clamps are designed to provide an airtight seal and protect the internal components of the steering gear. If the seal is not airtight, the vacuum generated during turning will draw water and contamination into the gear, causing failure of the steering gear components. Zip ties must not be used as they do not provide an airtight seal.
NOTICE: The inner ball joint grease is not compatible with water contamination. Do not allow water to become trapped in the grease or degradation and failure of the joint may occur.
NOTE: If the RH inner tie rod is being serviced, remove the LH outer tie rod end and bellows boot to access and hold the steering rack when loosening and tightening the inner tie rod.
-
Remove the tie rod end.
Refer to: Tie Rod End (211-02 Power Steering, Removal and Installation).
-
Remove the tie rod end jamb nut.
.jpg) |
-
If equipped.
Remove the underbody shield.
Refer to: Engine Front Undershield (501-02 Front End Body Panels, Removal and Installation).
-
-
Remove and discard the inner bellows boot clamp.
-
Remove and discard the outer bellows boot clamp.
-
Remove and discard the inner bellows boot clamp.
.jpg) |
-
NOTE: Move the bellows boot enough to gain access to the inner tie rod nut.
Position aside the bellows boot.
.jpg) |
-
NOTICE: Place the steering gear at the center position and hold the steering gear rack while loosening the tie rod. Use an appropriate-sized wrench on the flat/teeth of the rack to resist rotation and to prevent damage during removal of the tie rod.
Using an appropriate-sized wrench on the flat/teeth to hold the rack and an appropriate size crows foot wrench or open end wrench, remove and discard the tie rod.
.jpg) |
Installation
-
NOTICE: Place the steering gear at the center position and hold the steering gear rack while tightening the tie rod. Use an appropriate-sized wrench on the flat/teeth of the rack to resist rotation and to prevent damage during installation of the tie rod.
NOTE: The help of an assistant may be necessary to torque the RH tie rod.
Remove the tie rod.
Torque: 89 lb.ft (120 Nm)
.jpg) |
-
Apply the specified grease to the steering
gear-to-bellows boot mating surface and bellows boot groove on the
tie-rod.
Material: Motorcraft® Premium Long-Life Grease / XG-1-E1 (ESA-M1C75-B)
.jpg) |
-
-
Install the new steering gear bellows boot.
-
Install the new inner bellows boot clamp.
Use the General Equipment: Boot Clamp Pliers
-
Install the new outer bellows boot clamp.
-
Install the new steering gear bellows boot.
.jpg) |
-
If equipped.
Install the underbody shield.
Refer to: Engine Front Undershield (501-02 Front End Body Panels, Removal and Installation).
-
Thread the tie rod end jam nut onto the tie rod.
|
-
Install the tie rod end.
Refer to: Tie Rod End (211-02 Power Steering, Removal and Installation).
 Removal and Installation - Steering Gear Boot
Special Tool(s) /
General Equipment
Boot Clamp Pliers
Materials
Name
Specification
Motorcraft® Premium Long-Life GreaseXG-1-E1
ESA-M1C75-B
Removal
NOTICE:
The s..
 Removal and Installation - Tie Rod End
Special Tool(s) /
General Equipment
Tie Rod End Remover
Removal
NOTE:
Removal steps in this procedure may contain installation details...
Other information:
Ford Explorer 2020-2026 Owners Manual: Fuse Specification Chart
Engine Compartment Fuse Box WARNING: Always disconnect the battery before servicing high current fuses. WARNING: To reduce risk of electrical shock, always replace the cover to the power distribution box before reconnecting the battery or refilling fluid reservoirs...
Ford Explorer 2020-2026 Service Manual: Description and Operation - Rear Suspension - Component Location
N..
Categories
- Manuals Home
- 6th Generation Explorer Owners Manual
- 6th Generation Explorer Service Manual
- Auxiliary Power Points
- Description and Operation - Identification Codes
- Removal and Installation - Front Halfshaft Speed Sensor
- New on site
- Most important about car
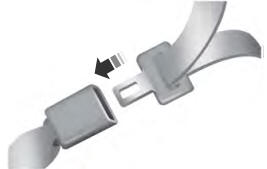
Fastening the Seatbelts
The front outboard and rear safety restraints in the vehicle are combination lap and shoulder belts.