Ford Explorer: Transfer Case / Installation - Transfer Case
Materials
| Name | Specification |
|---|---|
| Motorcraft® High Temperature 4x4 Front Axle and Wheel Bearing Grease XG-11 |
WSS-M1C267-A1 |
-
NOTICE: Do not over-lubricate the driveshaft components. Using excessive grease may damage the driveshaft components.
Lubricate the transfer case inner splines with grease.
Material: Motorcraft® High Temperature 4x4 Front Axle and Wheel Bearing Grease / XG-11 (WSS-M1C267-A1)
.jpg) |
-
Connect the transfer case to the transmission output shaft
the driveshaft and position the transfer case onto the transmission.
.jpg) |
-
Install the new transfer case mounting bolts.
Torque: 159 lb.in (18 Nm)
.jpg) |
-
Install the new transfer case mounting bolts.
Torque: 159 lb.in (18 Nm)
.jpg) |
-
Connect the transfer case wiring connector.
.jpg) |
-
Attach the transfer case vent hose.
.jpg) |
-
Install the transmission support crossmember.
Refer to: Transmission Support Insulator (307-01A Automatic Transmission - 10-Speed Automatic Transmission – 10R60, Removal and Installation).
Refer to: Transmission Support Insulator (307-01B Automatic Transmission - 10-Speed Automatic Transmission – 10R80, Removal and Installation).
Refer to: Transmission Support Insulator (307-01C Automatic Transmission - 10-Speed Automatic Transmission – 10R80 MHT, Removal and Installation).
-
NOTE: Cracks forming in the flex coupling are normal.
Inspect the flex coupling for damage. If internal windings (threads) are visible, replace the flex coupling if required.
Refer to: Driveshaft Flexible Coupling (205-01 Driveshaft, Removal and Installation).
.jpg) |
-
Inspect the driveshaft alignment bushing for damage, clean-off any contamination. If required replace the same.
Refer to: Driveshaft Alignment Bushing (205-01 Driveshaft, Disassembly and Assembly).
.jpg) |
-
NOTICE: Make sure the mating surfaces are free of any contamination including removing any blue Loctite from any mating surfaces.
Clean and inspect the mating surfaces of driveshaft flexible coupling. Clean-off any contamination or excess grease off of transfer case flange and pilot spigot.
.jpg) |
-
NOTICE: Do not over articulate the driveshaft or damage may occur.
NOTE: Do not force the flex coupling bushing on the transfer case output shaft or damage will occur.
-
Align the index-mark on driveshaft flexible coupling to the transfer case flange.
-
Install the new driveshaft flex coupling to transfer case flange bolts.
Torque: 81 lb.ft (110 Nm)
-
Align the index-mark on driveshaft flexible coupling to the transfer case flange.
.jpg) |
-
If equipped, install the transfer case heat shield.
Torque: 21 lb.ft (28 Nm)
.jpg) |
-
Check the transfer case fluid level.
-
NOTE: This step is only necessary when a new transfer case is installed.
Using the scan tool, carry out the Active Torque Coupling Configuration routine. The transfer case X-digit alpha numeric bar code is located on the label attached to the transfer case.
-
NOTE: This step is only necessary when a new transfer case is installed.
Perform the transfer case clutch learn procedure.
 Removal - Transfer Case
With the vehicle in NEUTRAL, position it on a hoist.
Refer to: Jacking and Lifting - Overview (100-02 Jacking and Lifting, Description and Operation)...
Other information:
Ford Explorer 2020-2025 Service Manual: Removal and Installation - Center Registers
Special Tool(s) / General Equipment Interior Trim Remover Removal NOTE: Removal steps in this procedure may contain installation details. Release the clips and remove the trim panel. Remove the bolts, release the clips and remove the display...
Ford Explorer 2020-2025 Service Manual: Removal and Installation - Engine Oil Pressure (EOP) Sensor
Removal NOTE: Removal steps in this procedure may contain installation details. NOTE: During engine repair procedures, cleanliness is extremely important. Any foreign material (including any material created while cleaning gasket surfaces) that enters the oil passages, coolant passages or the oil pan can cause engine failure...
Categories
- Manuals Home
- 6th Generation Explorer Owners Manual
- 6th Generation Explorer Service Manual
- Description and Operation - Identification Codes
- Driveline
- Traction Control
- New on site
- Most important about car
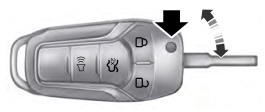
Integrated Keyhead Transmitter (If Equipped)
Use the key blade to start your vehicle and unlock or lock the driver door from outside your vehicle. The integrated keyhead transmitter functions as a programmed ignition key that operates all the locks and starts your vehicle, as well as a remote control.


