Ford Explorer: Handles, Locks, Latches and Entry Systems / Removal and Installation - Liftgate Release Switch
Ford Explorer 2020-2025 Service Manual / Body and Paint / Body and Paint / Handles, Locks, Latches and Entry Systems / Removal and Installation - Liftgate Release Switch
Special Tool(s) / General Equipment
| Interior Trim Remover |
Removal
-
Remove the liftgate moulding.
Refer to: Liftgate Moulding (501-08 Exterior Trim and Ornamentation, Removal and Installation).
-
Remove the liftgate release switch.
-
Disconnect the liftgate release switch electrical connector.
-
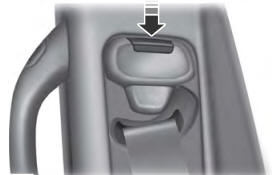
Release the retaining tabs and remove the liftgate release switch.
Use the General Equipment: Interior Trim Remover
-
Disconnect the liftgate release switch electrical connector.
.jpg) |
Installation
-
To install, reverse the removal procedure.
 Removal and Installation - Liftgate Lock Cylinder - Police
Removal
NOTE:
Repair individual liftgate lock cylinder by discarding the
inoperative liftgate lock cylinder and building a new liftgate lock
cylinder using the appropriate lock repair service kit..
 Removal and Installation - Rear Door Latch
Removal
NOTE:
Base vehicle shown, Police vehicle similar.
NOTE:
LH (left-hand) side shown, RH (right-hand) side similar.
All vehicles
Remove the rear door window regulator and moto..
Other information:
Ford Explorer 2020-2025 Service Manual: General Procedures - Seatbelt System Functional Tests
Check Functional Test - Seatbelt Buckle and Tongue WARNING: All seatbelt components must be inspected and corrected as part of any collision repair. Inspect all seatbelt components as prescribed by Seatbelt Procedure After a Collision found in Section 501-20A General Procedures of this manual...
Ford Explorer 2020-2025 Service Manual: Removal and Installation - Differential Housing Cover
Materials Name Specification Motorcraft® Ultra Silicone SealantTA-29 WSS-M4G323-A8 Removal With the vehicle in NEUTRAL, position it on a hoist. Refer to: Jacking and Lifting - Overview (100-02 Jacking and Lifting, Description and Operation)...
Categories
- Manuals Home
- 6th Generation Explorer Owners Manual
- 6th Generation Explorer Service Manual
- General Procedures - Brake Service Mode Activation and Deactivation
- Removal and Installation - Front Halfshaft Speed Sensor
- Traction Control
- New on site
- Most important about car
Seatbelt Height Adjustment
WARNING: Position the seatbelt height adjuster so that the seatbelt rests across the middle of your shoulder. Failure to adjust the seatbelt correctly could reduce its effectiveness and increase the risk of injury in a crash.
Copyright © 2025 www.foexplorer.com