Ford Explorer: Interior Trim and Ornamentation / Removal and Installation - Rear Door Trim Panel
Ford Explorer 2020-2025 Service Manual / Body and Paint / Body and Paint / Interior Trim and Ornamentation / Removal and Installation - Rear Door Trim Panel
Special Tool(s) / General Equipment
| Interior Trim Remover |
Removal
NOTE: LH (left hand) shown, RH (right hand) similar.
NOTE: Removal steps in this procedure may contain installation details.
-
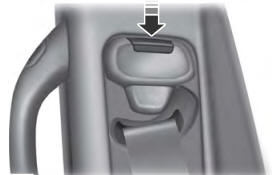
Remove the interior rear door handle bolt cover.
-
Position the interior rear door handle aside.
-
Release the clips.
Use the General Equipment: Interior Trim Remover
-
Position the interior rear door handle aside.
.jpg) |
-
Remove the interior rear door handle bolt.
Torque: 48 lb.in (5.4 Nm)
.jpg) |
-
Remove the rear door window control switch.
Refer to: Rear Door Window Control Switch (501-11 Glass, Frames and Mechanisms, Removal and Installation).
-
Remove the rear door trim panel middle bolts.
Torque: 48 lb.in (5.4 Nm)
.jpg) |
-
Remove the rear door trim panel lower bolts.
Torque: 15 lb.in (1.7 Nm)
.jpg) |
-
Release the rear door trim panel clips.
Use the General Equipment: Interior Trim Remover
.jpg) |
-
Remove the rear door trim panel.
-
Lift upward and outward on the rear door trim panel.
-
Release the tabs and position the rear door lock indicator aside.
-
Release the tab and position the rear door latch cable aside.
-
If equipped.
Disconnect the rear door tweeter speaker electrical connector.
-
If equipped.
Disconnect the rear door lock control switch electrical connector.
-
If equipped.
Disconnect the rear door ambient light electrical connector.
-
Lift upward and outward on the rear door trim panel.
.jpg) |
Installation
-
To install, reverse the removal procedure.
 Removal and Installation - Loadspace Trim Panel - Police
Special Tool(s) /
General Equipment
Interior Trim Remover
Removal
NOTE:
RH (right hand) shown, LH (left hand) similar.
Remove the D-pillar trim panel...
 Removal and Installation - Rear Scuff Plate Trim Panel
Special Tool(s) /
General Equipment
Interior Trim Remover
Removal
NOTE:
LH (left hand) shown, RH (right hand) similar.
Release the clips and remove the rear scuff plate tri..
Other information:
Ford Explorer 2020-2025 Service Manual: Description and Operation - Third Row Seats - Overview
Overview Third Row Power Fold Seats Pressing and releasing the power fold seat control switch (located in the rear cargo area on the RH loadspace trim panel) causes the corresponding third row seat backrest(s) to fold forward for additional cargo space...
Ford Explorer 2020-2025 Service Manual: General Procedures - Powertrain/Drivetrain Mount Neutralizing
Adjustment NOTE: Refer to the appropriate section and procedure for special instructions on loosening and tightening mount fasteners. Refer to: Jacking and Lifting - Overview (100-02 Jacking and Lifting, Description and Operation). Loosen, but do not remove, the powertrain/drivetrain mount fasteners...
Categories
- Manuals Home
- 6th Generation Explorer Owners Manual
- 6th Generation Explorer Service Manual
- Auxiliary Power Points
- Body and Paint
- Description and Operation - Jacking and Lifting - Overview
- New on site
- Most important about car
Seatbelt Height Adjustment
WARNING: Position the seatbelt height adjuster so that the seatbelt rests across the middle of your shoulder. Failure to adjust the seatbelt correctly could reduce its effectiveness and increase the risk of injury in a crash.
Copyright © 2025 www.foexplorer.com