Ford Explorer: Police Equipment / General Procedures - Group Flash Pattern Programming
Activation
-
IPTV Free Trial.jpg) WARNING:
Police Package warning lights are a high-intensity
Light-Emitting Diode (LED) type. Do not stare directly at these lights,
as doing so may cause temporary blindness and/or eye damage. Failure to
follow this instruction may result in personal injury.
WARNING:
Police Package warning lights are a high-intensity
Light-Emitting Diode (LED) type. Do not stare directly at these lights,
as doing so may cause temporary blindness and/or eye damage. Failure to
follow this instruction may result in personal injury.
NOTE: When cycling through flash patterns, most flash patterns include an off/on pattern followed by an inverse on/off pattern. Setting the LEDon one side to the on/off and the other to off/on creates the alternating pattern effect which should not be confused with synchronization which applies to the pattern timing between LED groups. For proper synchronization, the correct flash patterns must be selected for the individual flashing Light Emitting Diodes (LEDs). Refer to the Utility Police Interceptor Modifier Guide for specific flashing LED patterns.
Activate the flashing Light Emitting Diodes (LEDs) in the group to be programmed.
-
Locate the pattern programming circuits at inline C4231.
.jpg) |
-
To change the flashing pattern for grille, exterior
mirror and, if equipped, front auxiliary flashing Light Emitting Diodes
(LEDs):
-
To cycle forward to the next pattern, connect 12 volts to pin 2 of inline C4231 for less than 1 second.
-
To cycle back to the previous pattern, connect 12 volts to pin 2 of inline C4231 for greater than 1 second.
-
To cycle forward to the next pattern, connect 12 volts to pin 2 of inline C4231 for less than 1 second.
-
To change the flashing pattern for rear lamp, high mount
and decklid (underside) flashing Light Emitting Diodes (LEDs):
-
To cycle forward to the next pattern, connect 12 volts to pin 2 of inline C4231 for less than 1 second.
-
To cycle back to the previous pattern, connect 12 volts to pin 2 of inline C4231 for greater than 1 second.
-
To cycle forward to the next pattern, connect 12 volts to pin 2 of inline C4231 for less than 1 second.
 Diagnosis and Testing - Flasher Lighting, Siren and Speaker System
Diagnostic Trouble Code (DTC) Chart
Diagnostics in this manual assume a certain skill level and knowledge of Ford-specific diagnostic practices. REFER to: Diagnostic Methods (100-00 General Informati..
 General Procedures - Individual Flash Pattern Programming
Programming
All vehicles
WARNING:
Police Package warning lights are a
high-intensity Light-Emitting Diode (LED) type. Do not stare directly at
these lights, as doing so may cause..
Other information:
Ford Explorer 2020-2025 Owners Manual: Hands-Free Feature (If Equipped)
Make sure you have the intelligent access remote within 3 ft (1 m) of the liftgate. Stand behind your vehicle, and face the liftgate. Move your foot, in a single-kick motion, without pausing, under and away from the rear bumper detection area...
Ford Explorer 2020-2025 Service Manual: Removal and Installation - Driver Airbag
Removal WARNING: The following procedure prescribes critical repair steps required for correct restraint system operation during a crash. Follow all notes and steps carefully. Failure to follow step instructions may result in incorrect operation of the restraint system and increases the risk of serious personal injury or death in a crash...
Categories
- Manuals Home
- 6th Generation Explorer Owners Manual
- 6th Generation Explorer Service Manual
- Auxiliary Power Points
- General Procedures - Rear Camber Adjustment
- Removal and Installation - All-Wheel Drive (AWD) Module
- New on site
- Most important about car
Child Safety Locks
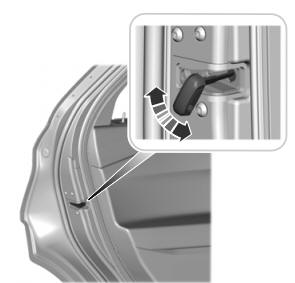
When these locks are set, you cannot open the rear doors from the inside.

A child safety lock is on the rear edge of each rear door. You must set the child safety lock separately on each door.
Left-Hand Side
