Ford Explorer: Interior Trim and Ornamentation / Removal and Installation - B-Pillar Trim Panel
Special Tool(s) / General Equipment
| Interior Trim Remover |
Removal
NOTE: LH (left hand) shown, RH (right hand) similar.
Upper and lower B-pillar trim panels
-
Remove the following items:
-
Remove the front scuff plate trim panel.
Refer to: Front Scuff Plate Trim Panel (501-05 Interior Trim and Ornamentation, Removal and Installation).
-
Remove the rear scuff plate trim panel.
Refer to: Rear Scuff Plate Trim Panel (501-05 Interior Trim and Ornamentation, Removal and Installation).
-
Remove the front scuff plate trim panel.
-
Position the front seat in the full forward position.
.jpg) |
-
https://magicaliptv.com/iptv-free-trials/
NOTE: Seats removed for clarity.
Release the tabs and remove the lower B-pillar trim panel cover.
.jpg) |
-
NOTE: Seats removed for clarity.
Remove the lower B-pillar trim panel.
-
Release the lower B-pillar trim panel clips.
Use the General Equipment: Interior Trim Remover
-
Feed the front seatbelt retractor and
pretensioner through the opening in the lower B-pillar trim panel.
-
Release the lower B-pillar trim panel clips.
.jpg) |
Upper B-pillar trim panel
.jpg) WARNING:
The following procedure prescribes critical repair steps
required for correct restraint system operation during a crash. Follow
all notes and steps carefully. Failure to follow step instructions may
result in incorrect operation of the restraint system and increases the
risk of serious personal injury or death in a crash.
WARNING:
The following procedure prescribes critical repair steps
required for correct restraint system operation during a crash. Follow
all notes and steps carefully. Failure to follow step instructions may
result in incorrect operation of the restraint system and increases the
risk of serious personal injury or death in a crash.
NOTE: Removal steps in this procedure may contain installation details.
-
Refer to: Pyrotechnic Device Health and Safety Precautions (100-00 General Information, Description and Operation).
WARNING:
Before beginning any service procedure in this
manual, refer to health and safety warnings in section 100-00 General
Information. Failure to follow this instruction may result in serious
personal injury.
-
Depower the SRS.
Refer to: Supplemental Restraint System (SRS) Depowering (501-20 Supplemental Restraint System) .
-
NOTE: Passenger assist handle cover has a tether on it that does not allow it to be fully removed.
Position the passenger assist handle cover aside.
-
Press upward and disengage the lower tab.
Use the General Equipment: Interior Trim Remover
-
Pull outward and disengage the lower tabs.
Use the General Equipment: Interior Trim Remover
-
Pull outward and disengage the middle tabs.
Use the General Equipment: Interior Trim Remover
-
Pull outward and disengage the upper tabs.
Use the General Equipment: Interior Trim Remover
-
Lift upward and outward and disengage the upper tab.
Use the General Equipment: Interior Trim Remover
-
Press upward and disengage the lower tab.
.jpg) |
-
Remove the passenger assist handle bolts and the passenger assist handle.
Torque: 80 lb.in (9 Nm)
.jpg) |
-
NOTE: Seats removed for clarity.
Position the front seatbelt retractor and pretensioner aside.
-
Disconnect the front seatbelt retractor and pretensioner electrical connector.
-
Remove the front seatbelt retractor and pretenioner anchor nut.
Torque: 35 lb.ft (47 Nm)
-
Disconnect the front seatbelt retractor and pretensioner electrical connector.
.jpg) |
-
Remove the upper B-pillar trim panel bolt.
Torque: 80 lb.in (9 Nm)
.jpg) |
-
Release the upper B-pillar trim panel lower clip.
Use the General Equipment: Interior Trim Remover
.jpg) |
-
Remove the upper B-pillar trim panel.
-
Pull outward on the upper B-pillar trim panel.
-
Pull downward on the upper B-pillar trim panel releasing the upper tabs.
-
Feed the front seatbelt retractor and pretenioner through the opening in the upper B-pillar trim panel.
-
Pull outward on the upper B-pillar trim panel.
.jpg) |
Installation
NOTE: During installation, make sure the seatbelt webbing is not twisted and the seatbelts and buckles are accessible to the occupants.
-
To install, reverse the removal procedure.
-
Inspect and position the front door and rear door
weather strip lips so that they overlap the top of the B-pillar trim
panels.
.jpg) |
-
Repower the SRS.
Refer to: Supplemental Restraint System (SRS) Repowering (501-20 Supplemental Restraint System) .
-
Check the seatbelt system for correct operation.
Refer to: Seatbelt Systems (501-20A Seatbelt Systems, Diagnosis and Testing).
 Removal and Installation - A-Pillar Trim Panel - Police
Special Tool(s) /
General Equipment
Interior Trim Remover
Removal
NOTE:
LH (left hand) shown, RH (right hand) similar.
Release the wedge nut...
 Removal and Installation - C-Pillar Trim Panel
Removal
NOTE:
LH (left hand) shown, RH (right hand) similar.
NOTE:
Removal steps in this procedure may contain installation details.
Remove the loadspace trim panel...
Other information:
Ford Explorer 2020-2025 Owners Manual: Gauges
4 Inch Display A - Tachometer. B - Information display. C - Speedometer. D - Fuel gauge. E - Engine coolant temperature gauge. Information Display Information that appears depends on your vehicle settings. See General Information. 6 Inch Display A - Tachometer...
Ford Explorer 2020-2025 Service Manual: General Procedures - Stay in Neutral
Activation NOTE: If the vehicle has a discharged battery, an external power source is required. If the battery discharges while in Stay in Neutral Mode, the park lock pawl solenoid will release and the transmission will return to Park. Do not tow the vehicle in this mode...
Categories
- Manuals Home
- 6th Generation Explorer Owners Manual
- 6th Generation Explorer Service Manual
- Removal and Installation - Front Halfshaft Speed Sensor
- Removal and Installation - All-Wheel Drive (AWD) Module
- Engine - 2.3L EcoBoost (201kW/273PS)
- New on site
- Most important about car
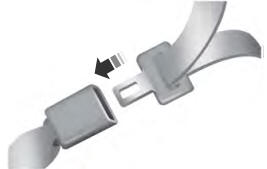
Fastening the Seatbelts
The front outboard and rear safety restraints in the vehicle are combination lap and shoulder belts.